코드나 텍스트, 버튼 등을 클릭하면 해당 코드나 텍스트가 복사되어 다른 곳에 붙여넣기 할 수 있도록 하고 싶은 경우가 있습니다. 네이버 카페에 워드프레스에서 텍스트나 링크 등을 누르면 텍스트가 복사되도록 하는 방법에 대한 질문이 올라와서 여기에 정리해 보았습니다. 상황에 맞게 적절히 응용하여 이용하시기 바랍니다.
워드프레스에서 텍스트/버튼 클릭 시 클립보드에 복사하는 방법
예를 들어, 할인코드나 프로모션 코드를 표시하고 사용자가 해당 코드를 누르면 복사되도록 해야 하는 상황이 있습니다.
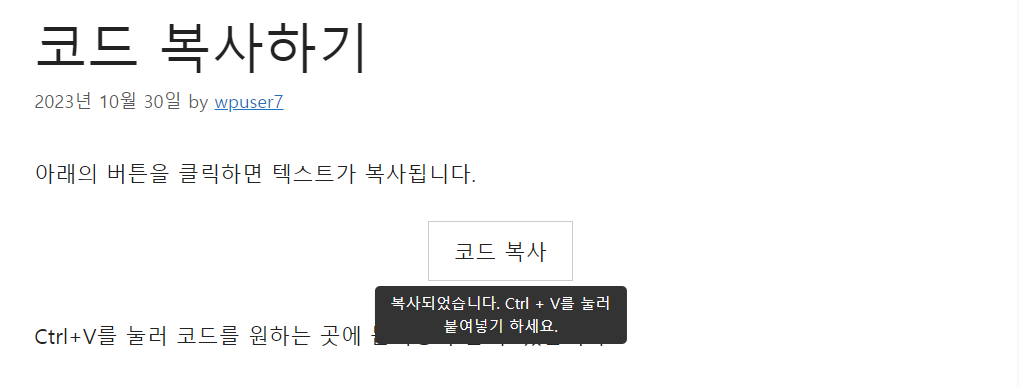
위의 그림과 같이, 워드프레스에서 텍스트를 버튼 형식으로 표시하고 텍스트 부분을 누르면 "복사되었습니다. Ctrl+V를 눌러 붙여넣기 하세요"라는 툴팁이 표시되도록 하는 방법에 대하여 간단히 살펴보겠습니다.
이 기능을 구현하려면 다음과 같은 방법으로 접근할 수 있습니다.
- 텍스트를 클릭하면 복사되도록 하고 툴팁이 표시되도록 하는 자바스크립트 코드를 만들어 추가합니다.
- 테마 함수 파일에 숏코드를 만들어 추가합니다.
- CSS 코드로 버튼과 툴팁 스타일을 지정합니다.
위와 같은 작업은 한 번만 수행하면 됩니다. 위와 과정이 완료되었다면 숏코드를 사용하여 원하는 곳에 복사할 텍스트를 버튼 형식으로 표시할 수 있습니다.
자바스크립트 코드
다음과 같은 JavaScript 코드를 추가합니다.
<script>
// Function to copy text to clipboard
function copyToClipboard(text) {
    var textarea = document.createElement('textarea');
    textarea.value = text;
    document.body.appendChild(textarea);
    textarea.select();
    document.execCommand('copy');
    document.body.removeChild(textarea);
}

// This function will be attached to each "copy-button" when clicked.
function handleCopyClick(e) {
    var textToCopy = e.target.getAttribute('data-clipboard-text');
    copyToClipboard(textToCopy);

    var tooltip = e.target.nextElementSibling;
    tooltip.style.display = "inline-block";

    setTimeout(function() {
        tooltip.style.display = "none";
    }, 2000); // Hide tooltip after 2 seconds

    // Remove event listener to prevent multiple bindings
    e.target.removeEventListener('click', handleCopyClick);
}

// Attach the event listener only when the user clicks on an element with the "copy-button" class
document.body.addEventListener('click', function(e) {
    if (e.target && e.target.classList.contains('copy-button')) {
        e.target.addEventListener('click', handleCopyClick);
        handleCopyClick(e); // handle the first click as well
    }
}, true);
</script>"워드프레스에서 js 스크립트 파일과 스타일시트를 올바르게 로드하는 방법"에서 설명하는 방법을 이용하는 것이 바람직합니다. 하지만 이 방법이 어렵거나 번거로운 경우 WPCode와 같은 플러그인을 사용하여 푸터 영역에 위의 코드를 추가할 수 있습니다.
GeneratePress 테마를 사용하는 경우 Elements에서 Hook를 만들고 wp_footer 영역에 상기 코드를 추가할 수 있습니다.
테마 함수 파일에 추가할 코드
차일드 테마가 설치되어 있지 않다면 차일드 테마(자식 테마)를 만든 다음, 테마 함수 파일(functions.php)에 다음과 같은 코드를 추가합니다.
/**
 * This function defines a WordPress shortcode named [copytext].
 *
 * The [copytext] shortcode can be used to wrap any text, making it clickable
 * for the purpose of copying that text to the clipboard.
 *
 * When used in a post or page, the enclosed text is wrapped in a <div> with a class of "copy-button".
 * This div is used as the clickable element for copying. The data-clipboard-text attribute
 * stores the actual text to be copied.
 *
 * Additionally, a tooltip in the form of a <span> element follows the <div>.
 * This tooltip is initially hidden and is displayed when the text is clicked,
 * giving feedback to the user that the text has been copied.
 * The tooltip contains the message "복사되었습니다. Ctrl + V를 눌러 붙여넣기 하세요.".
 *
 * @param array $atts - An array of attributes passed to the shortcode. In this function, it's unused.
 * @param string|null $content - The content enclosed between the opening and closing shortcode tags.
 * @return string - The generated HTML output replacing the shortcode.
 */
function copytext_shortcode($atts, $content = null) {
    return '<div class="copy-button" data-clipboard-text="' . esc_attr($content) . '">' . do_shortcode($content) . '</div><span class="copy-tooltip">복사되었습니다. Ctrl + V를 눌러 붙여넣기 하세요.</span>';
}
add_shortcode('copytext', 'copytext_shortcode');
FTP에 접속하여 /wp-content/themes/차일드-테마-폴더/functions.php 파일에 위의 코드를 추가하면 됩니다. FTP 접속 방법을 모르는 경우 웹호스팅 업체에 문의하시기 바랍니다. 클라우드웨이즈를 이용하는 경우 sftp에 접속할 수 있습니다.
"복사되었습니다..." 문구는 적절히 변경하세요.
커스텀 CSS 코드
외모 » 사용자 정의하기 » 추가 CSS 또는 테마의 스타일시트 파일(style.css)에 다음과 같은 CSS 코드를 추가합니다.
.copy-container {
    display: flex;
    justify-content: center;
    align-items: center;
    height: 100%; /* Adjust this if you want a specific height */
    position: relative; /* Required for positioning tooltip correctly */
	margin-bottom: 30px;
}

.copy-button {
    padding: 10px 20px;
    border: 1px solid #ccc;
    cursor: pointer;
}

.copy-tooltip {
    display: none;
    background-color: #333;
    color: white;
    padding: 5px 10px;
    position: absolute;
    bottom: -50px;
    left: 50%;
    transform: translateX(-50%);
    font-size: 12px;
    border-radius: 4px;
    white-space: nowrap;
    max-width: 200px; /* Set this to your desired maximum width */
    text-align: center; /* This will center-align multi-line content */
    white-space: normal; /* Allows the tooltip text to wrap if it's too long */
}
상기 코드는 텍스트를 버튼 스타일로 만들고 가운데 정렬이 되도록 합니다. 또한, 툴팁의 스타일을 지정하고 툴팁 컨테이너의 최대 너비를 제한합니다. CSS 스타일은 원하는 대로 적절히 수정하시기 바랍니다.
사용 방법
상기 작업은 한 번만 수행하면 됩니다. 위에 제시된 작업이 모두 완료되었다면 복사할 코드나 텍스트를 표시할 경우 다음과 같은 숏코드(단축코드) 형식으로 추가할 수 있습니다.
[copytext]복사할 텍스트[/copytext]마치며
텍스트를 누르면 텍스트가 클립보드에 복사되는 기능을 워드프레스에서 구현하는 예시를 살펴보았습니다. 구텐베르크(블록 편집기)의 버튼 블록을 활용하는 것도 가능할 것 같습니다. 버튼 블록의 버튼 텍스트를 복사하는 방법에 대하여 추후에 살펴보도록 하겠습니다.

댓글 남기기