Bluehost VPS service users can install "memcached". Installing and using memcahed (such as in a cache plugin in WordPress) will increase your site speed.
✅ Why I Left Bluehost After 9 Years of Use
How to install Memcached in Bluehost
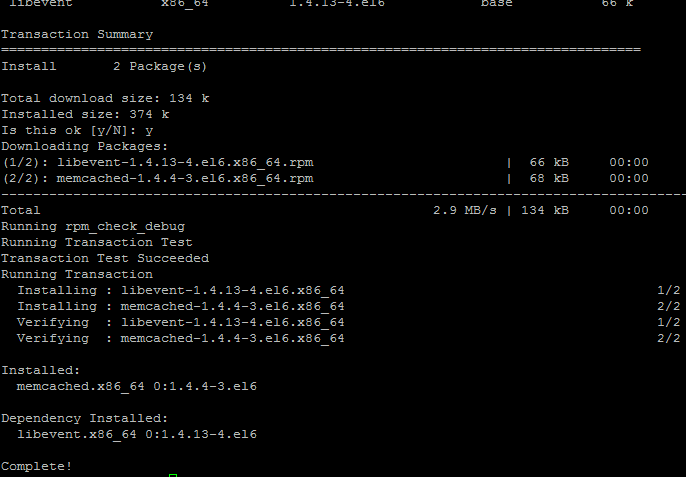
To install "memcached":
- Log into SSH terminal.
- $ sudo yum install memcached
- Installation of memcached will be complete.
- Restart your server (Optional)
- $ sudo service memcached start
To change the allocated memcached size:
- Please stop "memcached": $ sudo service memcached stop
- Edit /etc/sysconfig/memcached to change CACHESIZE="64" to the value you want . To edit "/etc/sysconfig/memcached":
nano /etc/sysconfig/memcached
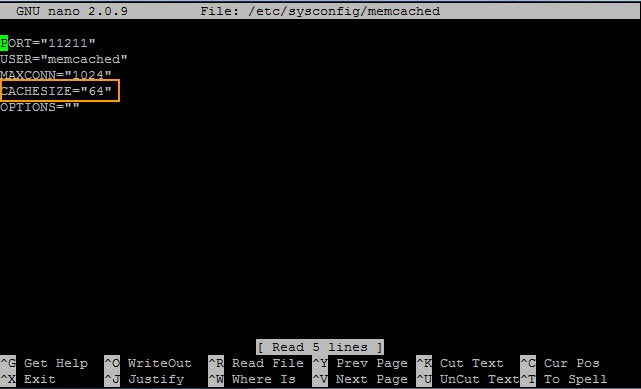 You can save the change by pressing Ctrl + X and then y. Please Enter.Please refer to this post about using nano in SSH terminal.
 - Restart "memcached": $ sudo service memcached start
Note:
- How to generate a Public/Private Key to access SSH terminal: https://my.bluehost.com/cgi/help/ssh-keygen
- If you encount an error message "[user_id] is not in the sudoers file. This incident will be reported", please refer to: https://my.bluehost.com/cgi/help/2358
- If you meet an error message "The following memcached servers are not responding or not running:" in the W3 Total Cache plugin in WordPress: $ sudo service memcached start (Please start memcached service.)
- If an error [Error writing /filename: Permission denied] occurs:
Please add sudo (Please see this).
You also need the "sudo" privilege to use "sudo" in SSH terminal.